Showing posts with label Kitbash. Show all posts

Sunday, 20 January 2013

Dark Angels Chaplain - Conversion - Painted


Here is the finished model of my recent Dark Angels Chaplain conversion based on the awesome artwork of Andrea Uderzo.


I ended up using a different right shoulder pad. I made a 'press mold' of the Dark Vengeance Chaplain shoulder pad with the skull on it and used that instead of the Forge World one shown above.

I also based the model on my 'Urban Base' ( see the labels for the link).

Here are the rest of the pictures.


Hope you like the finished Model.

Vitor


Friday, 21 September 2012

40k Dark Angels Chaplain Conversion Finished


This is the fantastic piece of artwork by Andrea Uderzo that inspired me to try my hand at such a difficult conversion. As you can see the finished model is next to it. Its not exact but as the conversion progressed I had to adjust for my lack of skills and I tried to include the main elements at least, the full robes, the pointing arm and the Crozius, the belt detail, scroll, cross and dagger, the burner and scrolls on the chest, the skull face and hood and the Iron Halo. In the Icon I used the three angels as the central theme and the basic 'house' shape. I didn't add any candles and wings as the Icon is already quite large and I thought it was going to be way to big with those extra bits.


The picture below has more detail of the rear of the Icon.


I am very happy with the way this turned out, I know it may not look clean and polished but it is magnified a few hundred times so in reality it looks much better.

The only things I might change are the shoulder pads, I didn't have any Dark angels ones at the time I finished the model.

Let me know what you guys think.


Vitor


Sunday, 16 September 2012

40k Dark Angels Chaplian Conversion Part 2


Next step was to use the mid section I cast up with the press mold. I cut the tabard section up as it is supposed to be a long scroll going down to the ground, hopefully when its painted it will look like that! I also needed to add an incense burner type thingy to the top part of the torso but my sculpting skills are nowhere near good enough for what is in the artwork this is based on, so I tried my best to roll up a ball and poke some holes in it, then sculpted an attachment for the rope plastic piece to attach on to. I then glued that to the model in what I hope is a natural look! I cant believe how difficult it is to poke holes in greenstuff and have it keep its shape, the ball kept deforming at every poke, very annoying. This conversion was getting more difficult by the minute.

The next big thing to sculpt was the icon on the back pack. It is three angels in a group bordered by a pointed square shape much like the front of a house shape you would draw as a kid plus some wings etc. I began quite well by buying the Dark Angel bits and cutting the wings of then gluing them together to form the trio. So far so good, next was the house shape?? I experimented with some plasticard but that didn't work as my skills not up to the task or my plasticard was to thick. I next tried to sculpt it out of greenstuff but my skills not good enough either. In the end I made a mold of the house shape and cast the piece then tried to cut out the inside to leave the hollow for the angels to fit inside. Unfortunately when I removed the cast it wasn't very smooth plus trying to cut out the middle was damaging the border even more as I went along so abandoned that.

So what I had left was what you see in the picture below.


I knew the artwork was a basis for my conversion but my skills were never good enough for an exact copy so what I needed was an icon with 3 angels in it and some fluffy stuff to round it off.

The more I looked at the piece the more I began to see an Icon that was really ancient and worn and damaged by being carried into battle ( use your imagination!! ). I could visualize this Icon painted up to be a gold sarcophagus type box that held three angels which represented the chapter with a suitable worn look. I added some purity seals in the front to represent all the prayers and incantations the chaplain would need in the battle.


Some more purity seals to the rear plus the incense burner thingy and called it a day.


In the end its not a clean cut and polished piece but I think it will represent the idea of an ancient Chapter Icon very well.

Next up all the pieces are put together for the final look and of course the artwork reveal that inspired this conversion.


Vitor


Monday, 10 September 2012

40k Dark Angels Chaplain Conversion


Ever since the rumours started going around saying the Dark Vengeance set would contain Dark Angels I have been thinking about a conversion for a chaplain model. I have long been a fan of Ron at From the Warp's conversions and his Dark Angels Chaplains are incredible! So with this motivation I set off with an idea that also involved trying to use a piece of art as a basis for my conversion. I found a fantastic piece of art to use as a basis and set about trying to put it into motion. My greenstuff skills are still very weak and I needed to keep my conversion simple but at the same time it had to stretch my abilities.

I don't want to reveal the picture as yet, it will spoil the article so i am going to show you the individual pieces as I went along. To start with the Chaplain is wearing robes, no surprise there then. I got a veterans torso and legs and glued a normal Marines torso front on it, then I cut off the eagle as it is going to be converted to the top half of his robes. My first green stuff challenge. I must say in my mind it was easy to do but in reality it's pretty difficult to get the flow of the robes looking realistic. After a couple of sculpts and re-sculpts I settled on something approaching what I wanted.


Next up was the head which in the artwork is a skull, not a helmet skull, with a hood. I thought again not to difficult but it's I found it tricky to get that realistic look! I used a Tomb Kings skeleton head as the basis, only because I had one in my bits box.


Next up was some detail around the midsection that I wanted to include and I could not find any bits to match except on the front torso of a Command Squad Sergeant so I ordered one up and then instead of cutting it up I made a press mold and cast on to use. I also needed an Iron Halo so used a previous mold as seen in the picture below.


Stay tuned to see how this guy progresses and see if you can guess which piece of artwork his based on.

Vitor


Sunday, 18 March 2012

Blood Angels - Tycho - Improved


When I finished my Tycho conversion and posted it up on my blog, Ron at From the Warp saw it and contacted me with two suggestions that would make him even better. See his post on painting faux details on models here http://fromthewarp.blogspot.com/2012/03/hobby-focus-faux-painting-to-trick-eye.html

The first was a tip to improve the gemstones. Ron suggested that I paint a white dot at the top of a gemstone to represent the reflected light and a coloured dot, depending on what the gem colour is, in my case red so the dot is to be orange on the bottom of the gemstone to represent the light travelling through the gemstone and coming out the other side.

The second was to improve the mask on his face by accenting the contrast between the two pieces more with a shadow on the flesh and a black highlight on the metal mask side. I tried to increase the shading on the flesh side but could not really improve the black highlight on the mask side much. My painting skills not quite there yet, its a pretty thin line to paint!


I really am happy with the way this conversion came out in the end and it shows you that small things can make a big difference to the end result.


Vitor

Saturday, 18 February 2012

Blood Angels - Tycho - Completed


All done, finally! Here is the completed conversion all painted up and ready to succumb to the 'Black Rage'.
I am really happy with the end result and in particular the experiment with painting his face to look like he is wearing a metal mask, idea taken from Ron at From The Warp post here  http://fromthewarp.blogspot.com/2011/06/adding-detail-to-other-areas-of-your.html

Enjoy the rest of the pictures.


Any comments are welcome.


Vitor

Wednesday, 15 February 2012

Blood Angels - Tycho - On the Painting Table Part 3

 My plans of finishing Tycho on the week end didn't work out but I did almost get him finished. Above you can see the completed angel on the shoulder pad. I also made a concerted effort to improve my gem painting skills and the gems here are much better compared to the ones I painted on my Sanguinary Guard unit.


Here is the other shoulder pad were I again made more of an effort to have a bigger contrast in the blended red areas, you can actually see the light to dark gradations. My Knights of Blood Terminators in the pictures the blending is non existent, so either my camera skills are improving or my painting is?? I also used a micron pen for the lettering on the seals.


You will have noticed that his head is missing, well I painted that separately and also I was not sure of how I was going to represent his damaged face. One idea was to sculpt the mask on but my greenstuff skills are nowhere near good enough for that. The other idea was to get a head with a metal bionic half and sculpt the hair part on with greenstuff. The third idea came from Ron at FromtheWarp where he painted a tabard out of cardstock to look like leather strips, see link here http://fromthewarp.blogspot.com/2011/06/adding-detail-to-other-areas-of-your.html . I decided to try Ron's method and took a normal Blood Angels head and began to paint the mask on the face with a black base coat as I want a metal look to contrast with all the gold on the model. Also I will paint his hair very yellow to match the Blood Angel figure in this picture of the Primarchs at the bottom.


Well that's as far as I got, will complete his head later.

Next post Tycho will be revealed with all his body parts attached.

Vitor

Friday, 10 February 2012

Blood Angels - Tycho - On the Painting Table Part 2

Did a bit more work on my Tycho conversion and he is starting to look good. I managed to paint up the cloth tabard and the white symbols as well as do more work on the gems.


Here you can see the work on the shoulder pad starting to take shape nicely. Hoping to finish him this weekend so stay tuned.

As always your comments are appreciated.


Vitor.

Sunday, 5 February 2012

Blood Angels - Tycho - On the Painting Table


I did this conversion/kitbash last year for the Miniature Conversion Contest. This year I finally got around to painting him up. I asked readers, in my previous post on Tycho, which armour set they liked more, the Death Company black armour or the gold Sanguinary Guard armour. One response from Snake88's blog said gold so decision made!


I started off with a nice base coat of Tin Bitz, then a dry brush coat of Shining Gold followed by a wash of devland mud in the recesses. The Shoulder pad and angel started off with a base coat of Scab Red, then a coat of Red Gore followed by a wash of Baal Red. The grey areas are Codex Grey. Tycho's combi weapon is Boltgun Metal and the Melta muzzle is Tin Bitz with a coat of Brazen Brass over the top.


Let me know what you think so far.

Vitor

Sunday, 1 January 2012

Happy New Year and the Obligatory Resolutions


First off Happy New year to everyone !! I hope it will be a better year for all of us.

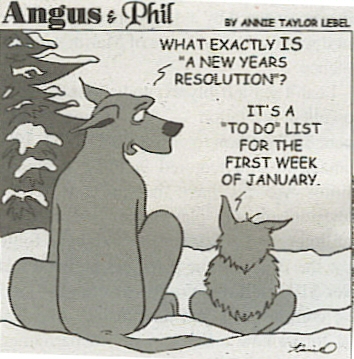
So on to the resolutions, as you can tell from the picture above I think they are easy to make but hard to keep. How many of us have wanted to start new armies in January only to give up by March? I know I have wanted to keep my motivation going earlier this year and that was the main reason for starting this blog six months ago now.

This year I have a few things I want to pursue more :

Commissions - I sold off my Mephiston conversion earlier and I would like to open my self up to taking on commissions. So if you are interested let me know!!!

Terrain !!! I really love making terrain and this year I made a few nice pieces that I wanted to share in a tutorial but have done nothing about it.


Badab War Minotaurs - I put them on hold as I heard earlier in the year that Forge World were making some bits and so they did. I have some shoulder pads on order so when they arrive I will be starting off an army with a tactical squad.

Conversions / Kitbashes - I have a desire to build some more conversions / kitbashes and the Minotaurs have some cool Characters to start with and I want to do some more Blood Angels (my Aurelius Legion Chapter plays with Blood Angels Rules), a new Mephiston, Astotath and some Sanguinary Priests. If I have the time I want to try out a Primarch or two.


So that's my to do list for the first week in January :) see photo


 Hope you all have a great 2012

Vitor

Wednesday, 19 October 2011

Blood Angels - Tycho - Miniature Conversion


This was my second option for the recent Miniature Conversion Contest. I entered my Mephiston Conversion but thought I would share this one with you as well.

I saw a conversion of Tycho on Heresy Online which I really liked, especially the pose. So I went about trying to do something similar, pose wise, but different so as not to be a copy. 


The conversion uses legs, left arm and torso from the Sanguinary Guard box set with the right leg cut and repositioned with a bit of greenstuff repair to look like he is standing with a leg resting on some terrain. The right arm / power fist or in his case 'Dead Mans Hand' and the head is from the Death Company box set. The combi-melta is a boltgun with the magazine cut off and barrel repositioned to accommodate the melta barrel, the magazine is from the Sanguinary Guard box set again.

I like the way he came out, all I need now is to decide on which colour scheme to paint him up in, Death Company / Sanguinary Guard  Gold / Normal Blood Angels Red ???? If you guys want to let me know which scheme you like best I will give that a go and post up the result.


Vitor

Tuesday, 13 September 2011

Ork Kommando - How to Make Backpacks !!


These are the real things from Forgeworld and very nice they are to. However you can make your own pretty cool back packs from very little.

First take some left over greenstuff, or use new if you don't have, and cut into a suitable square shape.

Second take two Space Marine ammo pouches, the large ones and cut one set in half.


Now you need to raid the bits box and for all manner of accessories that you wish to add, here I have a knife/choppa, some space marine grenades and some small ammo pouches. I also used a converted Stikkbomb.


Now start gluing the ammo pouches ( in your desired combination ) onto the greenstuff square.


Next grab all your accessories and have a ball!!


The unpainted backpack in action.


The final product, Ork Kommandos in action!


Hope you enjoyed the tutorial and let me know what you think with a comment.

Vitor