Showing posts with label Pre Heresy Sons of Horus. Show all posts

Sunday, 8 May 2016

Sons of Horus - Horus Heresy - Betrayal at Calth - Finished


All that was needed was to add washes and highlights and clean up any mistakes. The picture above shows the whole squad with the Lieutenant from a previous post.


These guys are finished and look pretty sweet. I loved the look of my Nightlords but I think these are even better.

This is the squad without the Lieutenant.


If I wasn't in a jam trying to decide which army to pursue, this is even worse.

Great place to be...might have to collect them all.

Vitor

Monday, 2 May 2016

Sons of Horus - Horus Heresy - Betrayal at Calth - WIP


Once I saw how well my Sons of Horus Lieutenant came out I knew I had to complete the squad. The BaC legionaries are great models and this time I added a heavy-bolter and melta-gun to the squad.


I started off with a black primer followed by a base layer of the Lupercal Green paint, then a couple of coats of  Sons of Horus Green paint from Forge World.


Once this was all dry I started to paint in the details with Boltgun Metal for the torso straps, armour joints, backpack and grenades. A Dark Brown for the leather ammo pouches.

Next I need to add the washes for shading, then some highlights to complete the models, happy with the way they are looking so far.

Stay tuned for the completed squad.

Vitor

Sunday, 21 February 2016

Greenstuff Press Mould - Helmet Crest - Betrayal at Calth

When I looked at the picture I was using as reference to paint up my Sons of Horus test marine I noticed his helmet crest was very similar to the one found on the Captain Sicarius metal model, which I have, in that instant I knew I could use it to make a greenstuff mould. The difference this time is that it needed to be a double sided mould.

There are two ways to approach this:

1) Use a single piece of greenstuff, wrap it around the item and press together, then when dry cut open.
2) Use two pieces of greenstuff and cast half the mould at a time.

I decided for the second option.

I prepared a rough block of greenstuff and pressed the item into the mould about halfway, left it to dry. Once dry I prepared a second block of greenstuff and repeated the process to the other side. I used olive oil as the non stick agent and applied to the item and the mould so the they would not stick to each other. Once that was dry I had my mould in two halves.


Now for the test, I prepared some greenstuff, used the oil as the non stick agent and pressed it into the one half of the mould and pressed the second part on top, left it to dry and amazingly it worked very well.


Highly recommended, although this probably wont work for every part you may want to replicate but give it a try.

Vitor

Sunday, 14 February 2016

Betrayal at Calth - Sons of Horus - Pre Heresy - Finished

 
 Finally got there, my first finished model of the Betrayal at Calth box set.

I really like the finished result and having the inspiration from the image of a Sons of Horus Lieutenant from the Horus Heresy Books to use for reference was fantastic.


No much more to say so enjoy.

Vitor

Sunday, 7 February 2016

Betrayal at Calth - Sons of Horus - Pre Heresy - WIP

The Betrayal at Calth box set is still providing difficult decisions for me with respect to which legion to go with. The options I explored in a previous post were Sons of Horus, Night Lords and Alpha Legion as a long shot, I am no closer than I was then.

Looking through my bits box I noticed that I had a couple of Forge World Sons of Horus shoulder pads so I decided to paint up a test model using one of the shoulder pads and combining that to paint the exact replica of the image of a Sons of Horus Lieutenant from the Horus Heresy Books to use for inspiration.


Once I had made this decision I ordered Lupercal Green and Sons of Horus Green from Forge World. I also made a greenstuff mold of the Old Captain Sicarius models helmet crest.

I base coated the model black and painted a base layer of Lupercal Green, as this is a paint designed for airbrushing it is nice and thin but your may need two coats to get the coverage you want.


Next was a layer of Sons of Horus Green and here I had to apply two coats to get a nice finish.


Next was to start painting the details.


Two interesting details I wanted to add to the model was the Cthonian 'mirror coin' tokens the Sons of Horus used to count honour in battles and the skulls which were gilded.

I couldn't find anything suitable to represent the tokens and if you have any ideas please let me know. The skull I used is the one with the bullet hole through the forehead from the terminators sprue (I think)which should be glued onto the base, I threaded some string through the bullet hole and attached it under the holster, perfect.

I just need to finish the details so stay tuned.


Vitor

Tuesday, 27 November 2012

Pre Heresy - Sons of Horus - Catulan Reavers


After I finished up with my Sons of Horus test mini where I used the glaze / wash  technique I was unhappy with the outcome but a thought popped into my head about repainting the model as a Catulan Reaver. I had seen the above Forgeworld picture alongside the others I used for research and instantly liked the scheme. This was the ideal opportunity to paint one up using my unsuccessful test subject.

I thought about sculpting the shoulder pad icon with greenstuff but decided to freehand it instead.


I first made a  sketch of the icon using a grid method. Basically a big square divided into 4 small squares with the design drawn inside. This would help me later when it cam time to paint the design onto the model.


The next thing I did was to paint over the green with my custom metallic black mix I use for my Blood Angels - Knights of Blood models. Then I painted the red shoulder pad and various s details leaving the lower portion of the helmet the original green.


I added some battle damage with a light drybrush of boltgun metal and used some pigment for dust and dirt accumulation.


Below you can see the original green on the helmet.


Lastly the shoulder pad icon. Painting two straight lines proved quite difficult actually!


I am very happy with how this guy came out. I think the Catulan Reaver scheme is pretty badass and can imagine a full army, painted up nicely, looking just awesome on the table. 

Vitor


Thursday, 22 November 2012

Pre Heresy - Sons of Horus - Finished


Finished the details on this guy and I must say based on my goals of quick and easy table top quality, this was a huge success. I really like the look of the washed armour colour.

Now to the part I am not happy with. This scheme does not scream out to me Sons of Horus, it looks more like a Salamader Marine, to me anyway. Maybe if I painted the 'eye' on the shoulder pad it would be better but I doubt it.

Here is a picture of the back.


Let me know if you think this looks like Sons of Horus or not.

After painting this I had a idea! stay tuned for that later.

Vitor

Monday, 19 November 2012

Pre Heresy - Sons of Horus - On the Painting Table


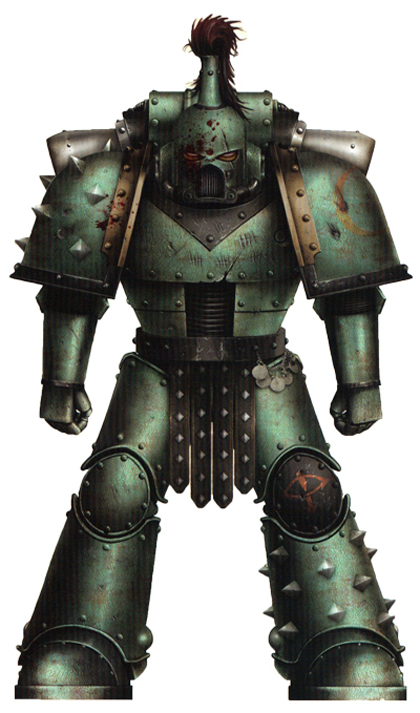
Sons of Horus colour scheme, above are two different looks.
One is a metallic forest green and darker than the second. The second is a matt sea green/grey much lighter and non metallic.
 
The question from me on a post I did on the Horus Heresy Blog is which one of the two schemes to paint on my next test model for this series of Pre Heresy Legions?
 
One answer I got was to paint the metallic scheme using washes over a light base colour. 
 
This got me thinking as it is expanding on my recent work where I have been using washes to achieve the end result (see Word Bearers and Minotaur Scout posts). 

With the same objective in mind as the previous pre -heresy models, quick and easy table top quality, I decided to give this a try. 
 
I went for a boltgun metal base colour over a black primer. I was relatively careful to leave the recesses dark to create the depth of the shadows to the model.


I then began to add the washes of green. The Forgeworld Marine above looks like a good match for new GW green wash and that is what I used straight out of the pot.

After one coat.


I thought it was a bit too light so I applied another.


Its close but I wasn't sure so I went for another coat.


I think this looks like a good match.

How much easier can it be? all I have to do now is finish off the details.

Let me know if you think 3 washes is the way to go, or should I have stopped at 2?

Vitor