Showing posts with label Dark Angels. Show all posts
Sunday, 6 July 2014
Dark Angels Deathwing Terminators - Dark Vengeance - Finished
I have finished all the highlights and the basing. The models have come out very nicely however after taking the pictures the limitations of my very old camera are very evident.
In the pictures you cant see the different shades of paint on the armour nor can you see the red highlights on the assault cannon. The green tabard has another area the camera has had difficulty showing.
I believe the core problem is the combination of colours, when models have any large red areas then I have this issue.
Anyhow, enjoy the pictures.
Vitor
Friday, 27 June 2014
Dark Angels Deathwing Terminators - Dark Vengeance - WIP 2
I have now started to work on the Base colours of the rest of the model. I painted black all the areas will be metallic or grey first. These areas will then be painted with Boltgun Metal or Codex Grey next followed by a Nuln Oil black Wash. I will finish these areas with a drybrush of each colour mentioned to add a highlight to the raised parts.
All the red areas I base-coated with Scab Red then highlighted with Blood Red and then a wash of Reikland Fleshshade. Finished with a highlight of Mephiston Red.
The green areas were base coated with Dark Angels Green followed by a highlight of a 60/40 mix with Goblin Green, next a wash with Caliban Green and a highlight with the 60/40 mix again.
See the finished shots in the next post.
Vitor
Friday, 20 June 2014
Dark Angels Deathwing Terminators - Dark Vengeance - WIP
Back onto my Dark Vengeance box set and this time I am trying out my hand on the Deathwing Terminators. The colour scheme is a new challenge as I generally stay far away from light colours over large areas of a model, they can be difficult to paint well, I am thinking of whites and yellows. The Deathwing colour scheme however is a bone colour so anything close to that is a good choice as far as authenticity goes. I also had a look at various other hobbyist takes on the scheme in particular 'From the Warp' blog.
I started off with a grey primer, see top picture.
I then followed that with a good base coat of GW Karak Stone.
Next I gave the models a good wash with Agrax Earthshade to define the shading of the model.
Next was to clean up the wash by re-paint the stone colour.
Now that I have the armour pretty much done I will continue withe the rest of the model.
Stay tuned.
Vitor
Sunday, 27 April 2014
Dark Angels Tactical Squad - Dark Vengeance - Finished
After painting in the base colours of the details I washed them and followed up with highlights in the base colour and a bit more layering with the tabard of the squad leader and face.
Overall I liked the finished look of the models and it was pretty easy and quick to achieve a good result.
This is what I am trying to get to after all, a quick and easy method to good results! Something everyone with little effort can accomplish.
Let me know what you think.
Vitor
Monday, 21 April 2014
Dark Angels Tactical Squad - Dark Vengeance - WIP
A small Update on these guys. I managed to paint in the base colours of the rest of the models. Now I can start using washes to create depth and shadow and finally paint the highlights.
Hopefully I will have time to take more pictures along the way, I just have so little time these days that stopping to take pictures is a difficult decision..lol
Vitor
Monday, 14 April 2014
Dark Angels Tactical Squad - Dark Vengeance
More work on my Dark Vengeance Box Set, this time the Dark Angels get some love. I started with a Grey Primer as that is all I have, followed by a coat of Dark Angels Green.
It didn't cover as well as I would like so a repeated the process.
I then used a liberal wash with Black Wash.
Next I dry-brushed a highlight of 50/50 Goblin Green and Dark Angels Green.
Lastly I washed the models with a generous wash of Coelia Greenshade just to blend the base and highlights better.
More soon.
Vitor
Thursday, 24 January 2013
Dark Vengeance Chaplain - Shoulder Pad Press Mold
Here are some pictures showing how I did the shoulder pad press mold for my Dark Angels Chaplain conversion.
For detailed instructions click on the Label for other posts on this subject.
Basically take some greenstuff press it onto the item you wish to mold using something to prevent the greenstuff sticking then remove and clean up cast.
Use cast item on your conversion!
Vitor
Sunday, 20 January 2013
Dark Angels Chaplain - Conversion - Painted
Here is the finished model of my recent Dark Angels Chaplain conversion based on the awesome artwork of Andrea Uderzo.
I ended up using a different right shoulder pad. I made a 'press mold' of the Dark Vengeance Chaplain shoulder pad with the skull on it and used that instead of the Forge World one shown above.
I also based the model on my 'Urban Base' ( see the labels for the link).
Here are the rest of the pictures.
Hope you like the finished Model.
Vitor
Labels:
40k,
Chaplain,
Conversion,
Dark Angels,
Hobby,
Kitbash,
Space Marines
Friday, 21 September 2012
40k Dark Angels Chaplain Conversion Finished
This is the fantastic piece of artwork by Andrea Uderzo that inspired me to try my hand at such a difficult conversion. As you can see the finished model is next to it. Its not exact but as the conversion progressed I had to adjust for my lack of skills and I tried to include the main elements at least, the full robes, the pointing arm and the Crozius, the belt detail, scroll, cross and dagger, the burner and scrolls on the chest, the skull face and hood and the Iron Halo. In the Icon I used the three angels as the central theme and the basic 'house' shape. I didn't add any candles and wings as the Icon is already quite large and I thought it was going to be way to big with those extra bits.
The picture below has more detail of the rear of the Icon.
The only things I might change are the shoulder pads, I didn't have any Dark angels ones at the time I finished the model.
Let me know what you guys think.
Vitor
Labels:
40k,
Chaplain,
Conversion,
Dark Angels,
Hobby,
Kitbash,
Space Marines
Sunday, 16 September 2012
40k Dark Angels Chaplian Conversion Part 2
Next step was to use the mid section I cast up with the press mold. I cut the tabard section up as it is supposed to be a long scroll going down to the ground, hopefully when its painted it will look like that! I also needed to add an incense burner type thingy to the top part of the torso but my sculpting skills are nowhere near good enough for what is in the artwork this is based on, so I tried my best to roll up a ball and poke some holes in it, then sculpted an attachment for the rope plastic piece to attach on to. I then glued that to the model in what I hope is a natural look! I cant believe how difficult it is to poke holes in greenstuff and have it keep its shape, the ball kept deforming at every poke, very annoying. This conversion was getting more difficult by the minute.
The next big thing to sculpt was the icon on the back pack. It is three angels in a group bordered by a pointed square shape much like the front of a house shape you would draw as a kid plus some wings etc. I began quite well by buying the Dark Angel bits and cutting the wings of then gluing them together to form the trio. So far so good, next was the house shape?? I experimented with some plasticard but that didn't work as my skills not up to the task or my plasticard was to thick. I next tried to sculpt it out of greenstuff but my skills not good enough either. In the end I made a mold of the house shape and cast the piece then tried to cut out the inside to leave the hollow for the angels to fit inside. Unfortunately when I removed the cast it wasn't very smooth plus trying to cut out the middle was damaging the border even more as I went along so abandoned that.
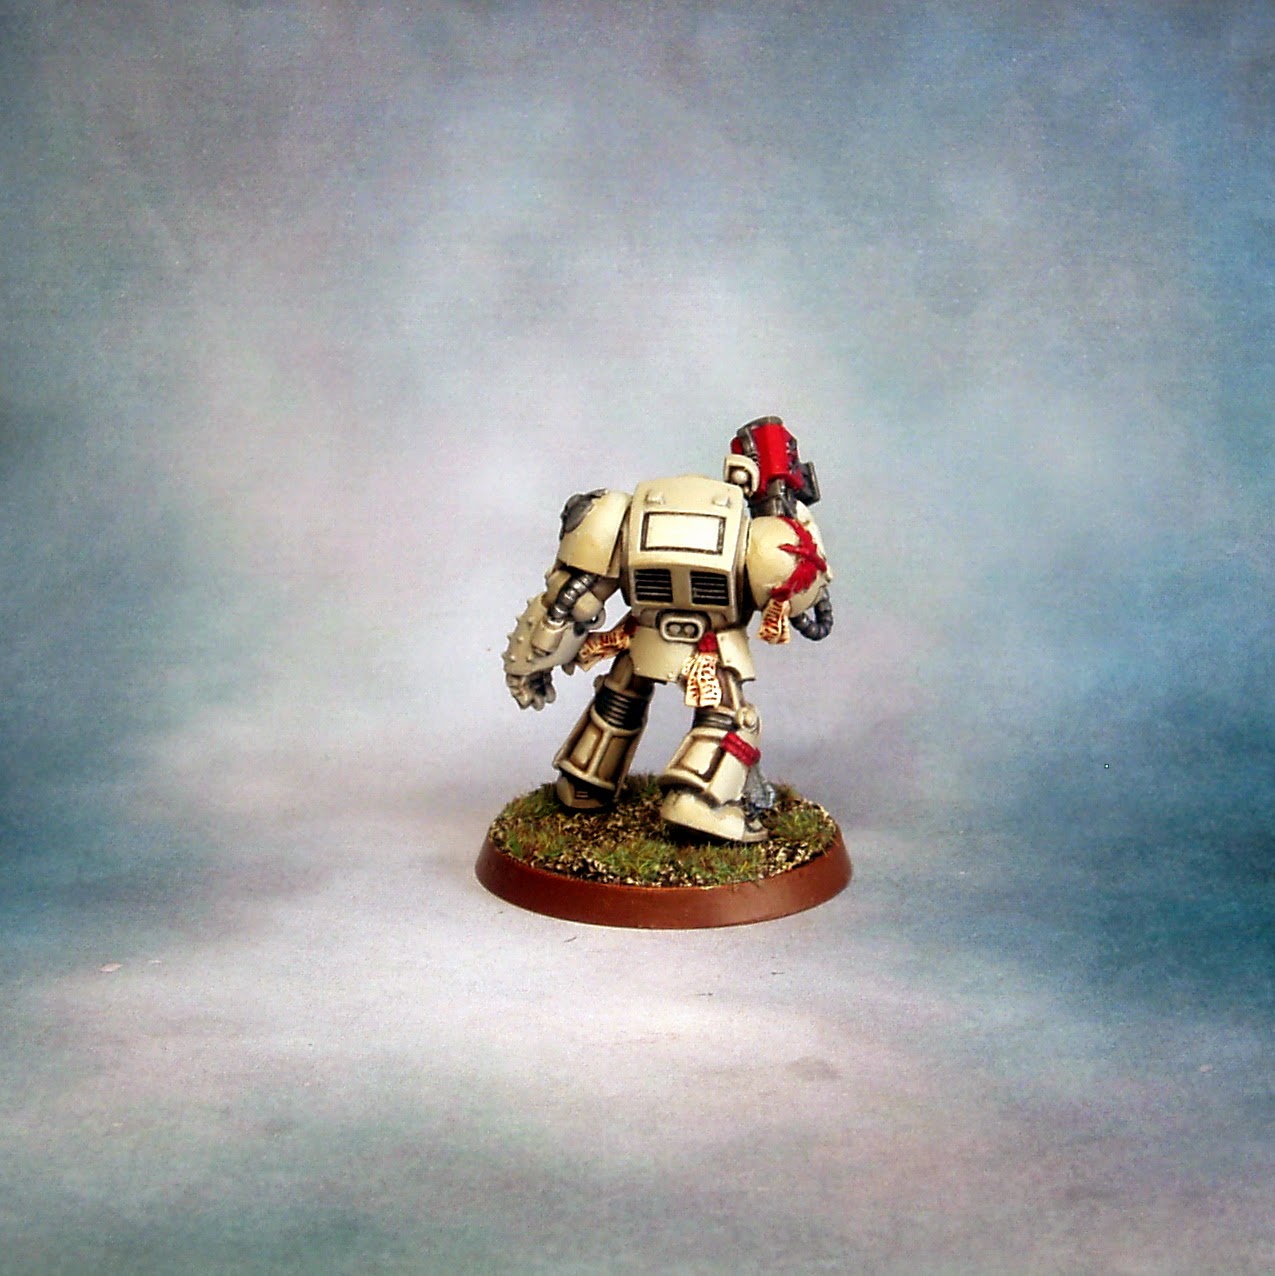
So what I had left was what you see in the picture below.
I knew the artwork was a basis for my conversion but my skills were never good enough for an exact copy so what I needed was an icon with 3 angels in it and some fluffy stuff to round it off.
The more I looked at the piece the more I began to see an Icon that was really ancient and worn and damaged by being carried into battle ( use your imagination!! ). I could visualize this Icon painted up to be a gold sarcophagus type box that held three angels which represented the chapter with a suitable worn look. I added some purity seals in the front to represent all the prayers and incantations the chaplain would need in the battle.
Some more purity seals to the rear plus the incense burner thingy and called it a day.
In the end its not a clean cut and polished piece but I think it will represent the idea of an ancient Chapter Icon very well.
Next up all the pieces are put together for the final look and of course the artwork reveal that inspired this conversion.
Vitor
Subscribe to:
Posts (Atom)