Showing posts with label Herbs. Show all posts
Tuesday, 22 October 2013
Flames of War - Pak40 Ammunition Crates and Shells Press Mold Finished
Well here it is!
All I had to do was add some highlights and attach the pieces to my Herb and Pepper base.
Below is a picture of the 2 guns together.
I am pleased with the end result considering that the castings were far from perfect.
Vitor
Labels:
Black Pepper,
Flames of War,
Herbs,
Pak40,
Press Mould
Friday, 11 October 2013
Flames of War - Pak40 - Base Comparison
I wanted to show the different look between the standard base you get with the Pak40 and the one I did with Herbs and Pepper.
The picture above shows the gun on the base as you would assemble it normally.
Below is the gun on the thin plastic base with Pepper and Herbs. It is my intention to base my force on these type of bases.
Which do you prefer?
The other item of note here is that I did a press mold of the metal ammunition box and shells to use on my new base. I will show that on the next post.
Vitor
Monday, 2 September 2013
Creating a Base using Herbs and Pepper
Want a base so good you can eat it, literally?
Furthering my experiments with basing techniques I wanted to create a base that was quick, easy and required no painting whatsoever.
I have in the past already used herbs and black pepper on bases but never together. So I decided to try it out.
I started with a thin plastic card cut to size, it is for my Flames of War Pak40, but can be used for any type of game system.
I painted a layer of PVA glue on each side of the plastic card just to give it a bit more stiffness. Then I primed the base, in this case a grey primer. ( not really required )
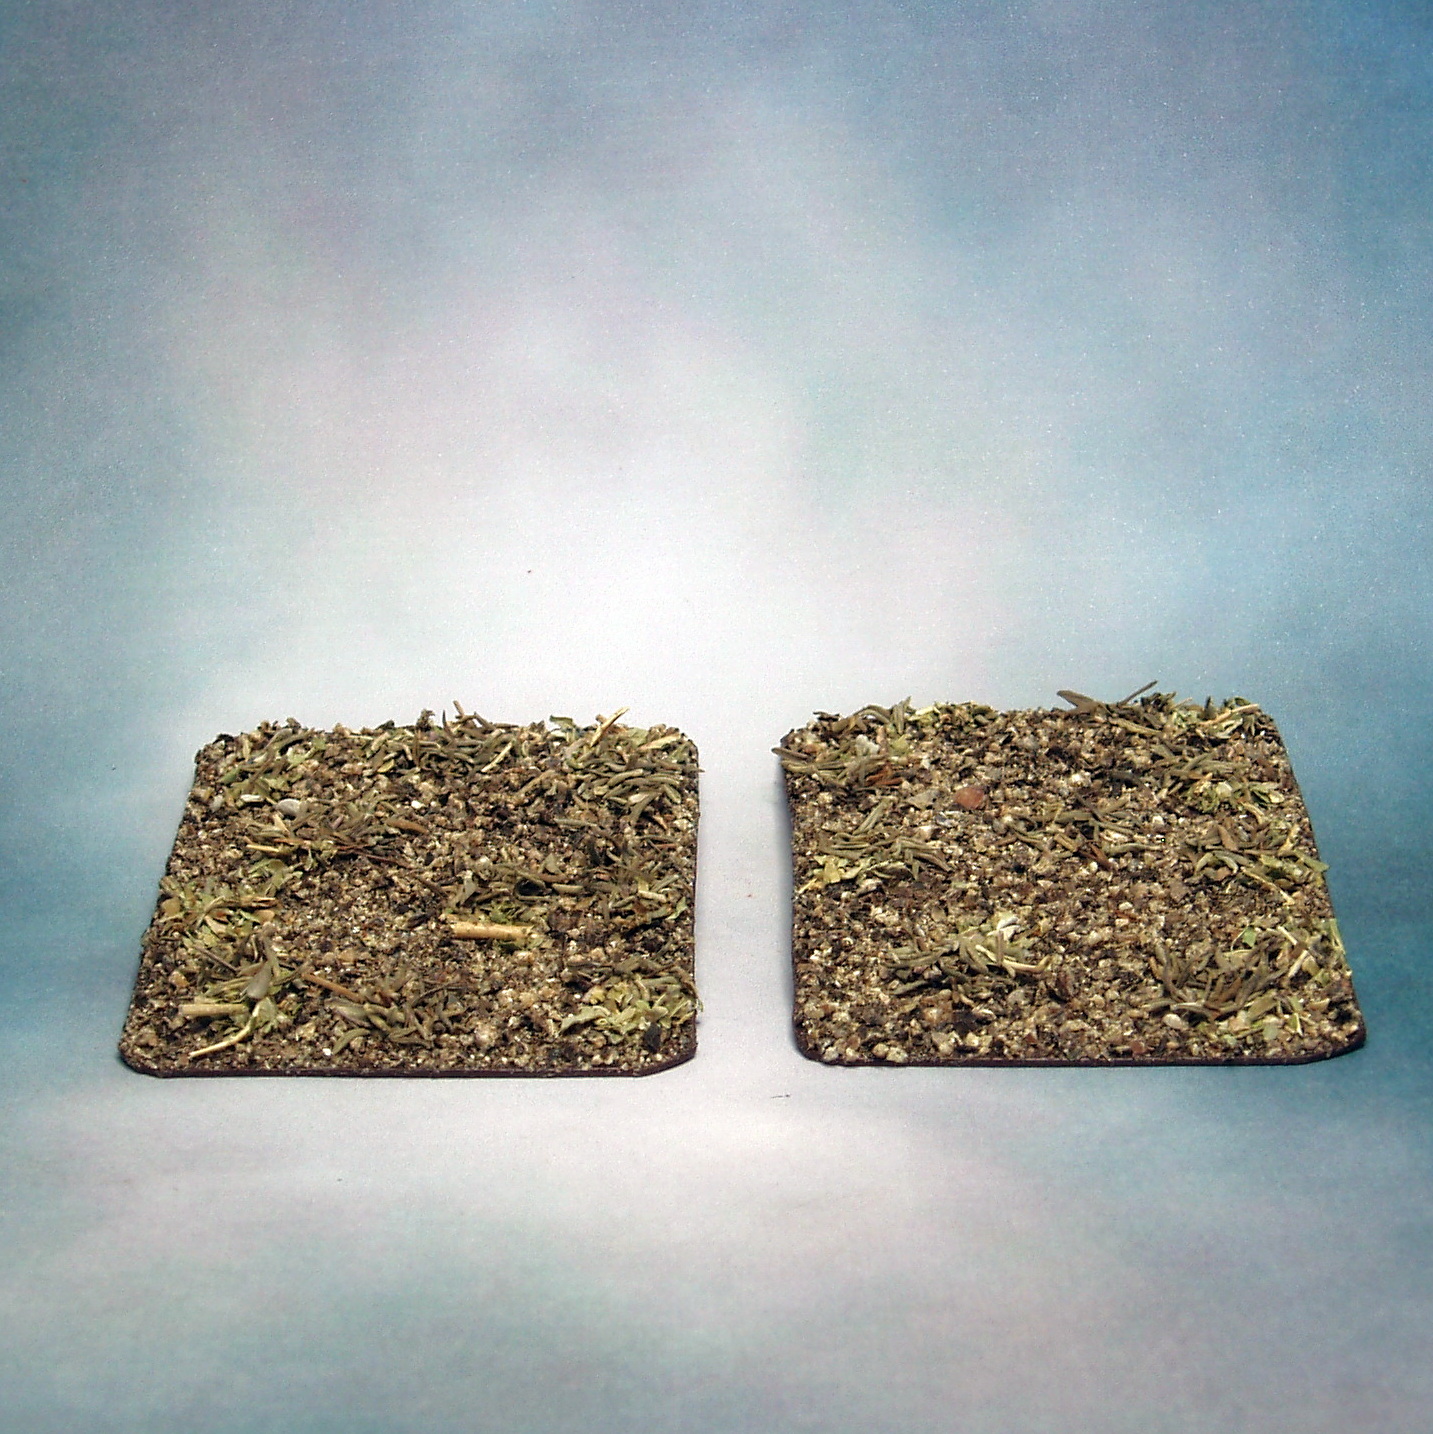
Once that was done I painted another layer of PVA glue on one side and using my pepper grinder I ground out the pepper corns over the base until it was covered.
Once that was dry I painted some small areas with PVA again and sprinkled my chosen herbs, Oregano, over the base and let it dry.
The result is pretty damn realistic and no painting required.
Hope you have a go at this as it is super easy and fun.
Vitor
Saturday, 15 June 2013
Terrain - Flames of War - Bocage - Finished
Here is the finished piece of Bocage.
What I did from the last stage was to spray the piece with a primer, in this case a grey.
Then paint the base to match your gaming board or as per your choice. I went for various browns for the sand part and greys for the stones.
Then prepare a large quantity of PVA glue and soak the sponges in it and apply the chosen herbs or paint it onto the sponges in sections like I did.
The sponges absorb a lot of glue so beware !
And that's all there is to it. Enjoy!
Vitor
Saturday, 8 June 2013
Terrain - Flames of War - Bocage - using Foam and Herbs WIP
I had some old foam sitting on my hobby desk for some time now that I was going to use to pack miniatures in and the other day I was looking at it and the idea occurred to me to use it to make Bocage.
I did a bit of research into what Bocage is and found that it is generally made up from an earth bank, possibly stones, thick bushes or hedgerows and trees. The height of the Bocage can can vary because of the age of the hedgerow, the height of the trees and the possible ditch on the sides.
I had seen a tutorial before and made my base assembly in a similar way. I started with a hard board base cut to size, followed by sand glued on with PVA.
I then used hot glue to attach some small pebbles / stones to the center of the base, leaving some gaps to accommodate the toothpicks that would form the frame for the foam Bocage to adhere to.
I cut the toothpicks down to size and tor off some pieces of the foam, trying to get some irregular shapes.
I then attached the foam pieces to the toothpick frame with PVA glue but Superglue is better.
Next up painting it up and applying the herbs.
Vitor
I did a bit of research into what Bocage is and found that it is generally made up from an earth bank, possibly stones, thick bushes or hedgerows and trees. The height of the Bocage can can vary because of the age of the hedgerow, the height of the trees and the possible ditch on the sides.
I had seen a tutorial before and made my base assembly in a similar way. I started with a hard board base cut to size, followed by sand glued on with PVA.
I then used hot glue to attach some small pebbles / stones to the center of the base, leaving some gaps to accommodate the toothpicks that would form the frame for the foam Bocage to adhere to.
Vitor
Tuesday, 7 May 2013
Flames of War - Bases with Plastic Card and Herbs
When I was almost onto the painting stage of my paper card bases I saw, sitting on my desk, a file with a hard plastic cover. I had a second look and discovered it might be perfect, it was sturdy and very thin.
I cut out two sections and followed the same procedure as with the paper bases, namely paint white glue on both sides allow to dry then apply sand on one side. I painted up my sand with a base of Scorched Brown, drybrush with Bestial Brown followed by a drybrush of Bubonic Brown and finally Bleached Bone.
When you compare the two bases side by side you can see that the plastic card base with the sand is as high as the official base without any sand added, that makes the base about 1.5mm lower overall, a big difference in 15mm scale miniatures.
As Flames of War is historical I wanted to make the base look realistic so I decided to experiment with adding herbs to the base. I used a mix of Oregano and Thyme with some Scenic Grass.
I think the end result came out very well and I will be using this method for the rest of my army.
Vitor
Subscribe to:
Posts (Atom)