Showing posts with label Rhino. Show all posts

Monday, 1 April 2013

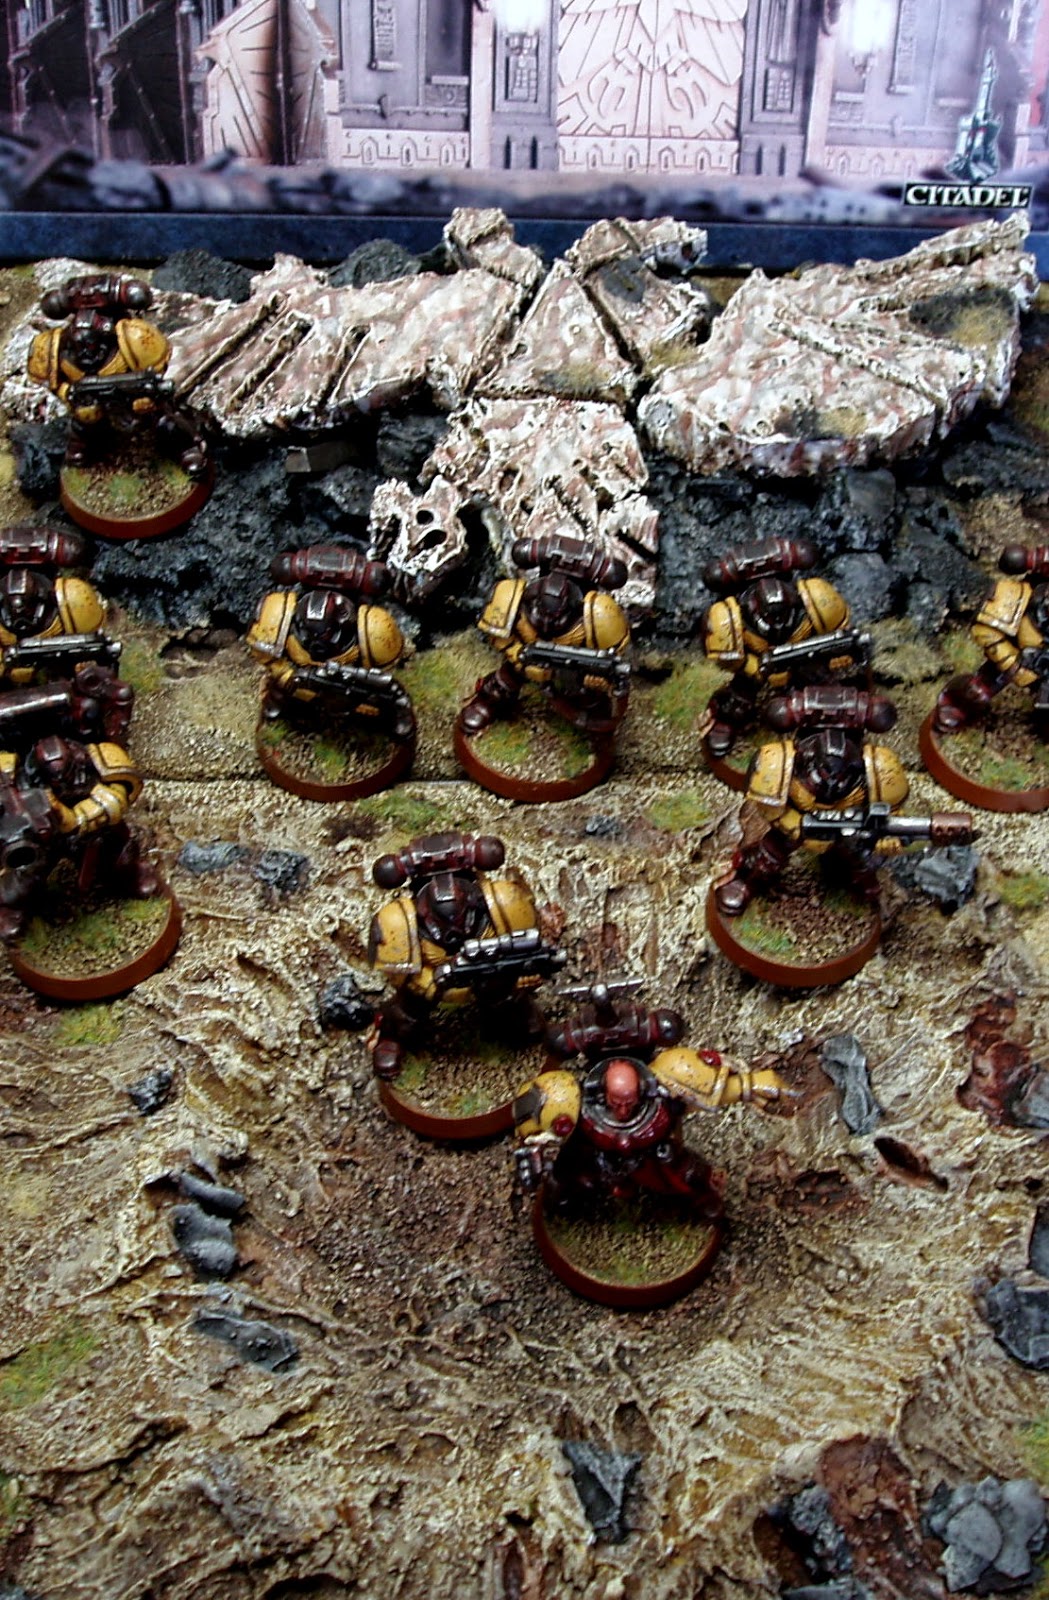
40k - Terrain - Ruined Aquila Showcase


Here are a few pictures of the original terrain piece showing what it looks like on the table top. The picture above is of my Aurelius Legion Rhino, in an old colour scheme, pulling up behind the Aquila ready to disembark its troops.

Here the Tactical Squad has crossed over the Aquila and taken cover in a crater.

Vitor


Friday, 26 October 2012

Minotaurs - Rhino - Badab War - Finished


Well its all done and I really like the finished effect the sponge had on the main bronze parts of the model, no streaks no brush strokes and no pooling of the wash. I added a bit of battle damage to the red armour just to give it a bit of interest and then painted the brass etched icons which really do make the Rhino look the part, also a much cheaper option than buying the very nice but expensive Forge World doors and front plates.

So here are the rest of the pictures.


Enjoy

Vitor

Monday, 22 October 2012

Minotaurs - Rhino - Badab War - Part 2


So this is as far as I got.


All the bronze and metal areas are completed using my standard Minotaurs painting method, namely Tin Bitz base coat followed by a drybrush of Brazen Brass, wash of Thraka Green, another drybrush of Brazen Brass followed by a wash of my custom verdigris mix then a final drybrush of Brazen Brass.

Guess what? I telling fibs!!! This was originally painted up in my Aurelius Legion scheme and as I was painting it I experienced major problems with paint streaks which when viewed at certain angles looked awful in addition the wash would pool in these areas and make it even worse. Now the obvious solution is to use an airbrush and some other ideas I came across, thinned paints etc but I had an idea to use my old trusty sponge, the one I use for adding battle damage to my models. I thought the dabbing effect would eliminate all those streaks and as you can see in the pictures above IT WORKED!

So the process I used to paint the Rhino is exactly the one I described above but not drybrushing anything instead dabbing with my sponge.


Here are pictures of the initial steps.


I am very happy that this technique worked so well, stay tuned for the next post.


let me know if you have tried this method and your results.

Vitor


Friday, 19 October 2012

Minotaurs - Rhino - Badab War


Time for my Minotaurs to get some love, with all the other new stuff going recently they have taken a back seat but now its their time again.

I cleaned up my Rhino with Dettol as the original was painted out in my Aurelius Legion colour scheme, primed it in black followed by a watered down coat of black paint. I then received my bonus, the brass etched sprue from Forgeworld !! I glued one small one on the front then a large one on the side and rear.


All good to go so stay tuned to see how this baby turns out.


Vitor

Friday, 23 December 2011

Aurelius Legion - Rhino - Finished


This is it, the final part of painting and weathering my own Space Marine Chapter Rhino. In the last post I completed the bottom section of the Rhino, now it was time to tackle the top section.

I liberally applied the weathering pigment to all the recessed areas where dust and dirt would accumulate. (apologies for the poor close up pictures).


As you can see  I found it quite difficult to be neat about applying this stuff. I knew from the lower section that a lot of the pigment was going to be wiped off later so it was not such a big deal.


Now it was time to take my hard stippling brush and remove as much of the pigment as possible. I also used a cloth to wipe away whatever the brush could not get to. I did not use the alcohol to set the pigment as I did not want a repeat of the white frosting situation I encountered on the lower section.

Here are some pictures of the completed model. All in all it came out pretty well. I really like the dusty look of the pigments on the model. One thing to note is that light pigments applied on a light colour that is shaded with a darker colour do not work well (gibberish!!!!!) What I mean is that I found the pigment negated the brown wash I applied to the recesses of my yellow areas on the model.


Hope you like the way it came out and I recommend everyone have a go at this.

Vitor.

Monday, 19 December 2011

Aurelius Legion - Rhino - On the Painting Table - Part Three


This is where I got to before going on to my experiment with pigments or weathering powders. I ordered some Secret Weapon Pigments and decided to start on the underside and tracks of the Rhino in case things didn't go well, then I would not have to re-paint the whole thing. I must say that I initially got interested in pigments from reading Ron at From the Warp series on the subject, so check his out if you haven't already.

So first off I started to apply the pigment to the underside and came across my first problem, after a couple of dips in the pigment with your brush it flares out and is useless for detailed application. I grabbed my pretty beat up old brush, almost tank brush size, and just got the stuff on there hoping that it would clean up in later stages.


As you can see it was a mess, my next lesson learned was that this stuff is messy!! so make sure you are working on a large sheet of paper to collect all the excess as you can just pour it back into the pot to reuse. Don't touch your face with this stuff on your hands :)

Next step was to take a stiff brush and wipe away all that excess.


As you can see a fair amount was removed with the brush. The next step was to set the pigment with alcohol. I used a local alcohol and applied it liberally.


It worked really well in setting the pigment, in fact it was quite sticky until it dried so be careful not to touch it. The alcohol also, as I was hoping, did tone down the whole effect. The next stage was to then proceed with the bottom of the vehicle and work my way up to the top. I used my large used brush to add pigment to the lower portions around the tracks and the rear and front in a slightly more controlled manner.


The alcohol did its job as expected but with one very strange result, it turned white??? like the frosting you get when spraying a mini with sealant. I think it must be the brand or type of alcohol I am using as this problem does not seem to plague others.Well what to do now?? I pulled out my Black Wash and gave the area a good coverage to see if that would help.


The wash did help a lot, thank goodness. The pictures don't show it as clearly but it removed the frosting look and didn't cover up to much of the pigment.See below for some close ups.


 So far the experiment is teaching me loads and is kind of going in the right direction. So last but not least the rest of the Rhino will be done in the next post.

Vitor.


Thursday, 15 December 2011

Aurelius Legion - Rhino - On the Painting - Table Part Two


Managed to get all the painting done on my Rhino but didn't remember to take pictures of the stages duhh! The next phase was to add battle damage and some wear and tear etc. In the above picture you can already see the metal highlighting on the extreme edges of the Rhino.


I added some mud effect by applying paint with a small piece of sponge very lightly to the underside and track areas of the Rhino.


I then went back and did the same again but this time with Boltgun Metal to simulate new scratches etc.


Now all that is left is to try out my newly received pigments!! Stay tuned for the next part.

Vitor

Saturday, 10 December 2011

Aurelius Legion - Rhino - On the Painting Table


My poor Tactical Marines finally got a transport to ride around in. I intend to use this for gaming so didn't bother with the inside of the Rhino when assembling it, the only part that is removable is the Stormbolter on the hatch.


Here I have just started laying down the base colours of my Chapter, very messy at the moment.


More progress to follow soon.

Vitor