Showing posts with label Craters. Show all posts

Friday, 16 August 2013

Terrain - 40k - Diorama - Finished


All that was left to do was apply  the final touches namely some grass and some small touches with wash etc here and there.


Overall it was an enjoyable project and I think the final result worked out pretty well.


Hope this inspires you to try out something like this for yourselves.

Vitor

Friday, 9 August 2013

Terrain - 40k - Diorama - Painting WIP


Finalizing the base involved cutting the Deffkopta in half and removing the Ork pilot then using greenstuff I modeled the seat and closed up the gaps to make it look like damaged engine and frame parts.

Next I glued my tank traps and  crater lip pieces in place and used my trusty quick drying filler to create the ground on the terrain base. Once that was dry I glued my tree branch, bits of bark and the Deffkopta in place.


I was ready to prime my project and went to the DIY store and purchased a grey primer and used that on the terrain piece. Bad mistake! it turned out to have a gloss like finish which repelled paint rather than having improved paint adhesion qualities!

I had to paint the entire piece black again and that took several coats. Once done I used a scorched brown as the ground base colour followed by a selection of lighter browns to achieve my desired final colour which was bleached bone.


Next I cleaned up the non ground pieces with black again.

I started to paint the tank traps, tree and bark bits with a codex grey as the base colour.

Now it was time to add the washes to create shade and interest in the pieces. I used black and brown washes and mixes of each on the different elements. Once dry I drybrushed the pieces with a lighter shade of the original base colour.


Finally I painted up the Deffkopta  with lots of rust to make it look like it had been crashed for some time.


Now just the final elements to go!

Vitor


Saturday, 3 August 2013

Terrain - 40k - Diorama - The Design

This series of posts is from my previously lost archives and will now see the light of the web! My previous posts on terrain ( craters, tank traps, fence, ruined aquila and the ventilator) have been building up to this apex, namely putting together basic pieces of terrain to form a nice larger show-piece or focal point for your gaming board.

The piece below from GW inspired me to start on this entire process.

I originally wanted to make something very similar to the GW piece but I don't have the budget to wreck a Rhino for terrain purposes and even used ones on Ebay are pretty expensive. So I used the cheapest model I could find on Ebay at that time and that was an Ork Deffkopta form the Assault on Black Reach starter set. I then added craters to the design but went for tank traps rather than trees.

So the terrain piece is of an Ork Deffkopta crashed into tank traps after being shot down and or engine trouble with some craters from ordinance and some tree stumps for added effect as a homage to the original GW piece. I sketched these out on my hardboard base to see the layout and once happy I started to collect the pieces together.


I cut the rotors of the Deffkopta so they would look 'shot down', then cut out my tank traps from foam-board and for the lip of the crater I used some off-cuts from the foam-board tank trap pieces. I then lay the pieces out, including a twig from my garden, on the base to get an idea of what the finished result would look like.


Once I was happy with the layout I proceeded to finalize the base.

See stage 2 next.

Vitor

Monday, 1 April 2013

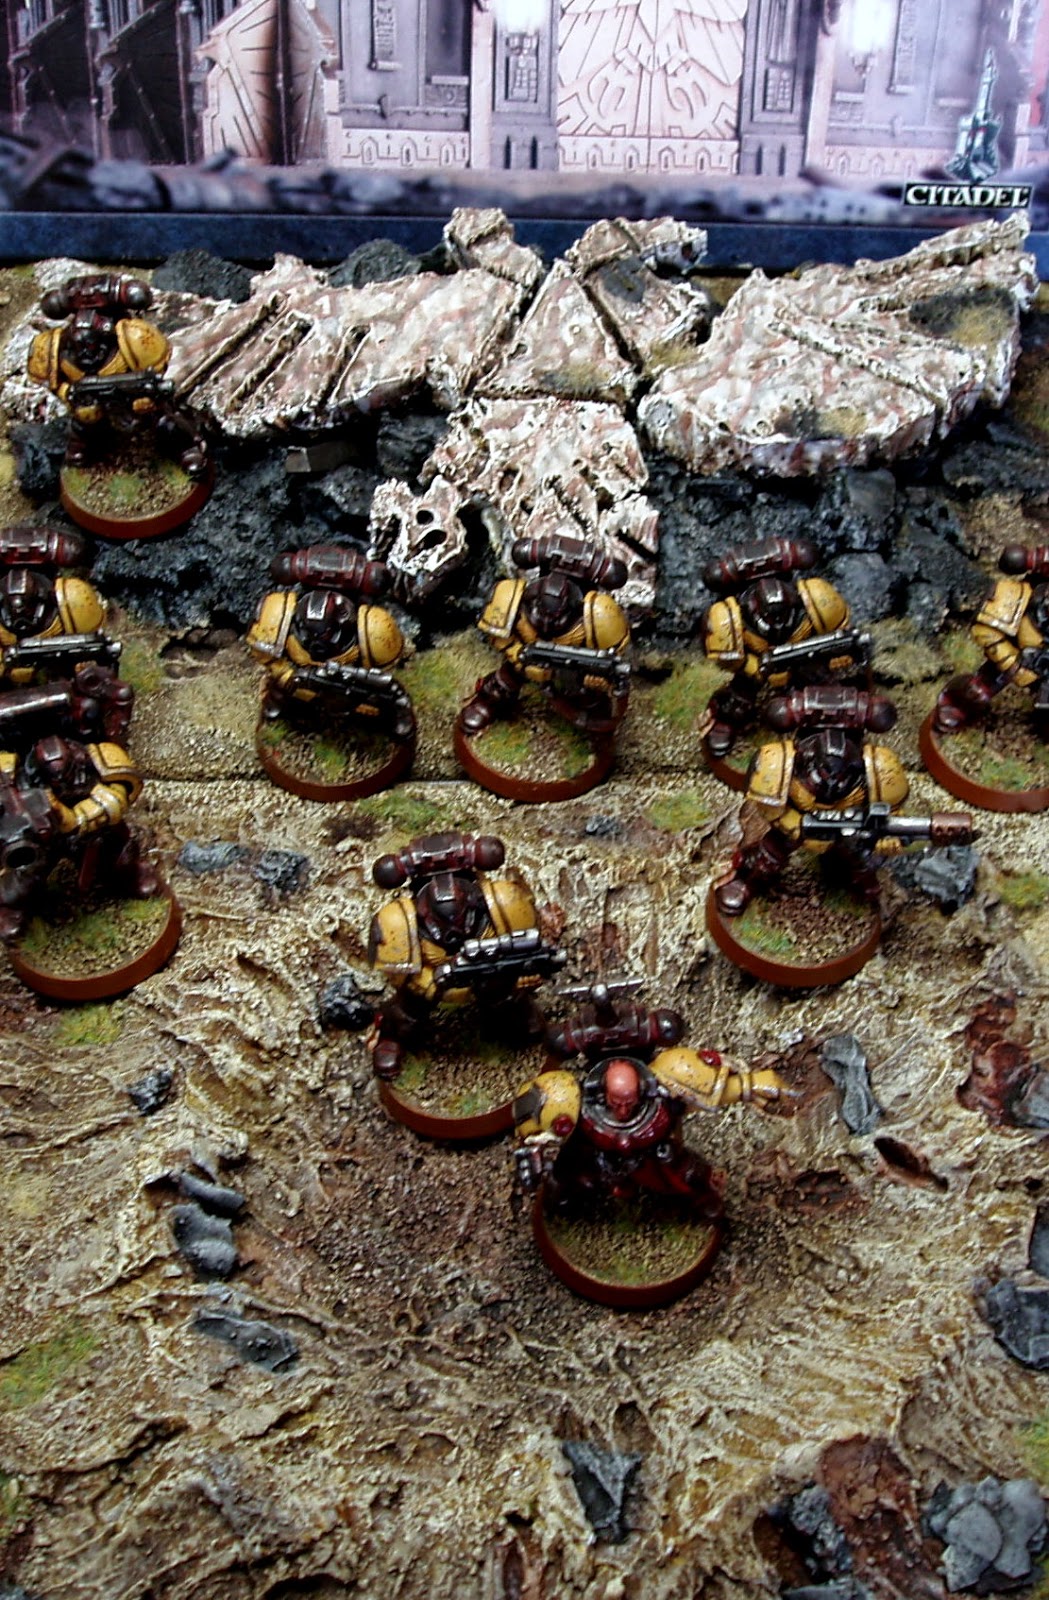
40k - Terrain - Ruined Aquila Showcase


Here are a few pictures of the original terrain piece showing what it looks like on the table top. The picture above is of my Aurelius Legion Rhino, in an old colour scheme, pulling up behind the Aquila ready to disembark its troops.

Here the Tactical Squad has crossed over the Aquila and taken cover in a crater.

Vitor


Friday, 29 June 2012

Terrain Focus - 40k Fence - Showcase


Here are a couple of pictures to show what the fence looks like on the battlefield. Above my Minotaur Scouts use the fence as cover before moving across the crater.


Above, my Aurelius Legion Tactical Squad takes cover in the rubble in front of the fence.


Hope you get motivated and make some terrain, 6th edition is bringing even more options with the chance to purchase terrain or even capture and use terrain on the battlefield!!


Vitor


Thursday, 8 March 2012

Terrain Focus - 40k Craters - Showcase


Here are some pictures of the craters with some posed Tactical Marines from my own chapter Aurelius Legion.


 Hope you liked them.

Vitor

Saturday, 3 March 2012

Terrain Focus - 40k Craters - Finished


To finish up our craters all we need to do is add a series of washes and some static grass. What I did was to use a heavy base wash of Devland Mud repeated a second time after the first is dry, but this time concentrating on the crater hole and outer ring to emphasise the crater. Next was a wash of Ogryn Flesh in random areas to create some variation. The debris was washed with Badab Black. Last but not least add some grass and you are all done.


Next post I will show some pictures of the craters with some Marines posed to show scale etc.

Vitor

Monday, 27 February 2012

Terrain Focus - 40k Craters - On the Workbench Part 2


I am painting up my craters to match the way my army is already based but you can try whatever takes your fancy here. Note - if you can use cheaper paints here, do it as terrain eats paint like crazy. I start with a base coat of Chaos Black followed by a layer of Scorched Brown.


Next I overbrush a layer of Bestial Brown.


Next I overbrush a layer of Vermin Brown.


Now a drybrush of  Bubonic Brown.


Now a drybrush of Bleached Bone, I repeated this step to get  a nice coverage.


Last I painted my debris with Chaos Black followed by a drybrush of Codex Grey.


Not completed yet but it will be in the next part where I finalise all the details to make it look good.


Vitor

Thursday, 23 February 2012

Terrain Focus - 40k Craters - On the Workbench Part 1


Still sticking to my new years resolutions and its nearly the end of February, maybe thats why its freezing in Europe. Back to the subject at hand, 40k Craters and how I make them. This post is the first in a series that will focus on making inexpensive, good looking terrain and hopefully you will have some fun while doing so. It will be called Terrain Focus.

Fisrt off you need a good base, I used what we call here hard board, its about 5mm thick and I cut two pieces as I want one piece for two smaller craters and one piece for a larger crater, the sizes are roughly 13cm x 15cm and 17cm x 16cm. If you want to think ahead you can cut the pieces to the size of your vehicles and use them as destroyed vehicle templates as well.I sketched out a rough design of the sizes of the craters and what I want to add to the scene, rocks, dead tree etc etc.


The next step is to glue in place, I used a hot glue gun, some bits that will form the craters edge, I used some left over high density foam. You could use anything, the idea is for this to add some strength to the craters edge and make it easier to form the shape in the next step. I also placed the twig to get the right size for my dead tree, not glued down as yet.


Now the fun part, take some quick drying polyfiller ( the stuff I use starts hardening within 15 min ), the stuff you use to fill cracks with in walls, then apply the filler to your base and shape accordingly. You will notice that it leaves fantastic grains and rough textures, very battlefield like! Then while its still wet place the rocks, debris, dead trees etc etc so that these items can be fixed in place when the filler dries completely then leave overnight.


Stay tuned for the next part where we will begin painting them up.

Vitor