Showing posts with label 40k. Show all posts

Sunday, 1 November 2020

My Foray into 3D Printing


 I have been wanting to get a resin 3D printer for a long time now and finally succumbed last week.


I purchased an Elegoo Mars and a Photon wash and Cure Station. The setup of both were easy and straight forward.

The first print on the Mars went sort of okay, I didn't even print off the test piece, just dived right in to Thingiverse with a space marine. The underneath of the arms didn't quite work properly, probably lack of supports and the scale was off but hey the detail is just mind blowing.

The second print went perfectly and I got 3 models in perfect shape.

Unfortunately I dropped the build plate onto the vat tray when I was cleaning the resin and it damaged the FEP sheet, I tried a few prints afterward but nothing was successful, the problem was I could be the FEP film, the model, the supports, the temperature, was the resin shaken enough etc etc. 

I ordered a new FEP sheet and printed off a set of legs which came out perfectly, the next model which was different didn't work again. Welcome to the highs and lows of 3D printing !!

I am now trying a different model, so wish me luck.


Vitor


Sunday, 7 June 2020

40k Terrain from Trash - Industrial Building #3


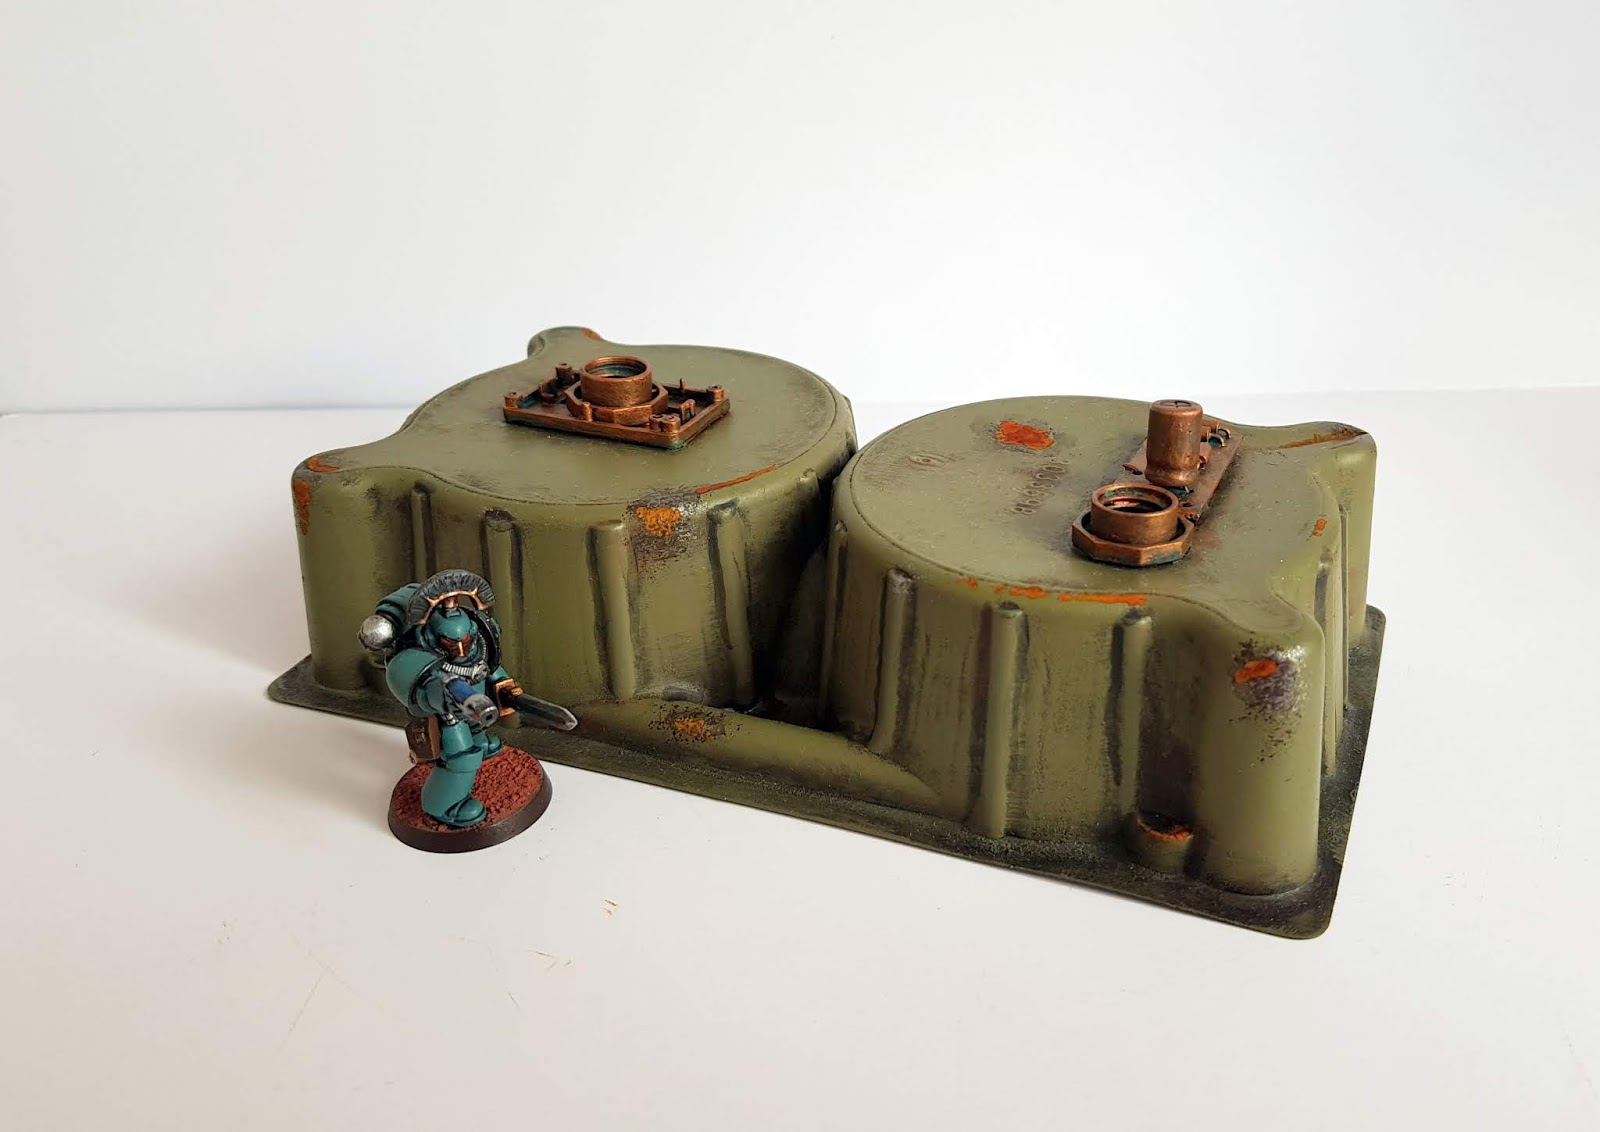
I followed the same process as before but used a light brown/sandy colour scheme. The other item I am proud of is that I finally managed to use the shaving blades on this piece of terrain, I have been holding onto these for ages now.


Enjoy.

Vitor.

Sunday, 26 April 2020

40k Terrain from Trash - Industrial Building #2


I followed the exact same process as in this post.

https://aureliuslegion.blogspot.com/2020/04/40k-terrain-from-trash-industrial.html

So just enjoy the pictures.


Vitor

Tuesday, 14 April 2020

40k Terrain from Trash - Industrial Building


Like most of you, over this period, I have had more time for hobby than in the last three years combined (probably).

I have always wanted to do some terrain from trash and again like many of you I have hoarded vast amounts of stuff in the 'I will use that one day' scenario. Well this is finally one of those days, I spotted a couple of nice looking biscuit packs and went to work.

They are very flimsy so I filled them with paper dipped in white glue which when dry made them fairly robust. Next I added some bits, bottle caps, pieces of lego or something similar, computer bits and some 40k bits.

I superglued them on being careful to not add to many bits as the packs had a nice shape already.

Next was to prime in black and then base coat with a WW2 green which looks great for these types of buildings in my opinion.


I added some black wash followed by a drybrush of the same green, next was to add some light brown wash/paint for dirt and rust. Next was to paint the brass bits follwed by a green oxide paint and a second drybrush of a lighter brass.


To finish off I did add some proper rust effect weathering by model mates which look amazingly real.


The second building in the next post.

Hope they provide some inspiration.


Vitor.

Sunday, 20 May 2018

40K Midori Style Scrapbook


So for something a little bit different.

I love the boxes that our fantastic plastic miniatures come in and GW do an outstanding job with them, they make great storage boxes and the artwork make them collectible, for me anyway. The same goes for White Dwarf magazines, the ones I buy, I keep and now and again look through them for inspiration etc.

I have long been looking for a way of making use out of the boxes and the articles and art work in WD and I stumbled upon a video on how to make a scrapbook and thought what better way to put all these great reference material into one place.

I had an old tablet case which I thought would make a sturdy cover for my scrapbook and I have been holding onto the Dark Imperium box (which is not the best for reusing as storage) for just this reason.

Method

The Cover - use something fairly rigid or take your favourite box art and laminate. I am using that tablet cover mentioned earlier and covering it with a section from the Dark Imperium Box.


The Binding - use some stretchy string or cord and thread through the spine after cutting the holes into your cover.


The Insert - I am using a notebook with blank pages but use whatever you want, if you are going to make notes in your scrapbook use something else or if you are going to draw or paint on the pages use the right paper.


Lastly fill the scrapbook with all your best inspiration.


Vitor

Sunday, 5 November 2017

Dark Imperium - Plague Marines - Finished


It feels like this has been a never ending task to complete. I have finally finished but actually I could keep on painting because there are so many details on these models its ridiculous.

The chaos protrusions etc were washed with blues, pink and purples with red used for tongues. The armour was washed with a 60/40 mix of brown and black wash then highlighted with original base colour. Rust (Model Mates) applied to various bits like chain mail. Some verdigris to areas of bronze armour. Cloth was painted in the same way as the post on the backpacks i.e. Warhammer TV method.


They are amazing models and hope the paint job did them justice.

Vitor